

Appearance
Users
The Users page is where you manage everyone with access to your customer's portal and tenants. The model is two-layer: users exist at the customer level, and you then assign them to tenants with a role.
Layout
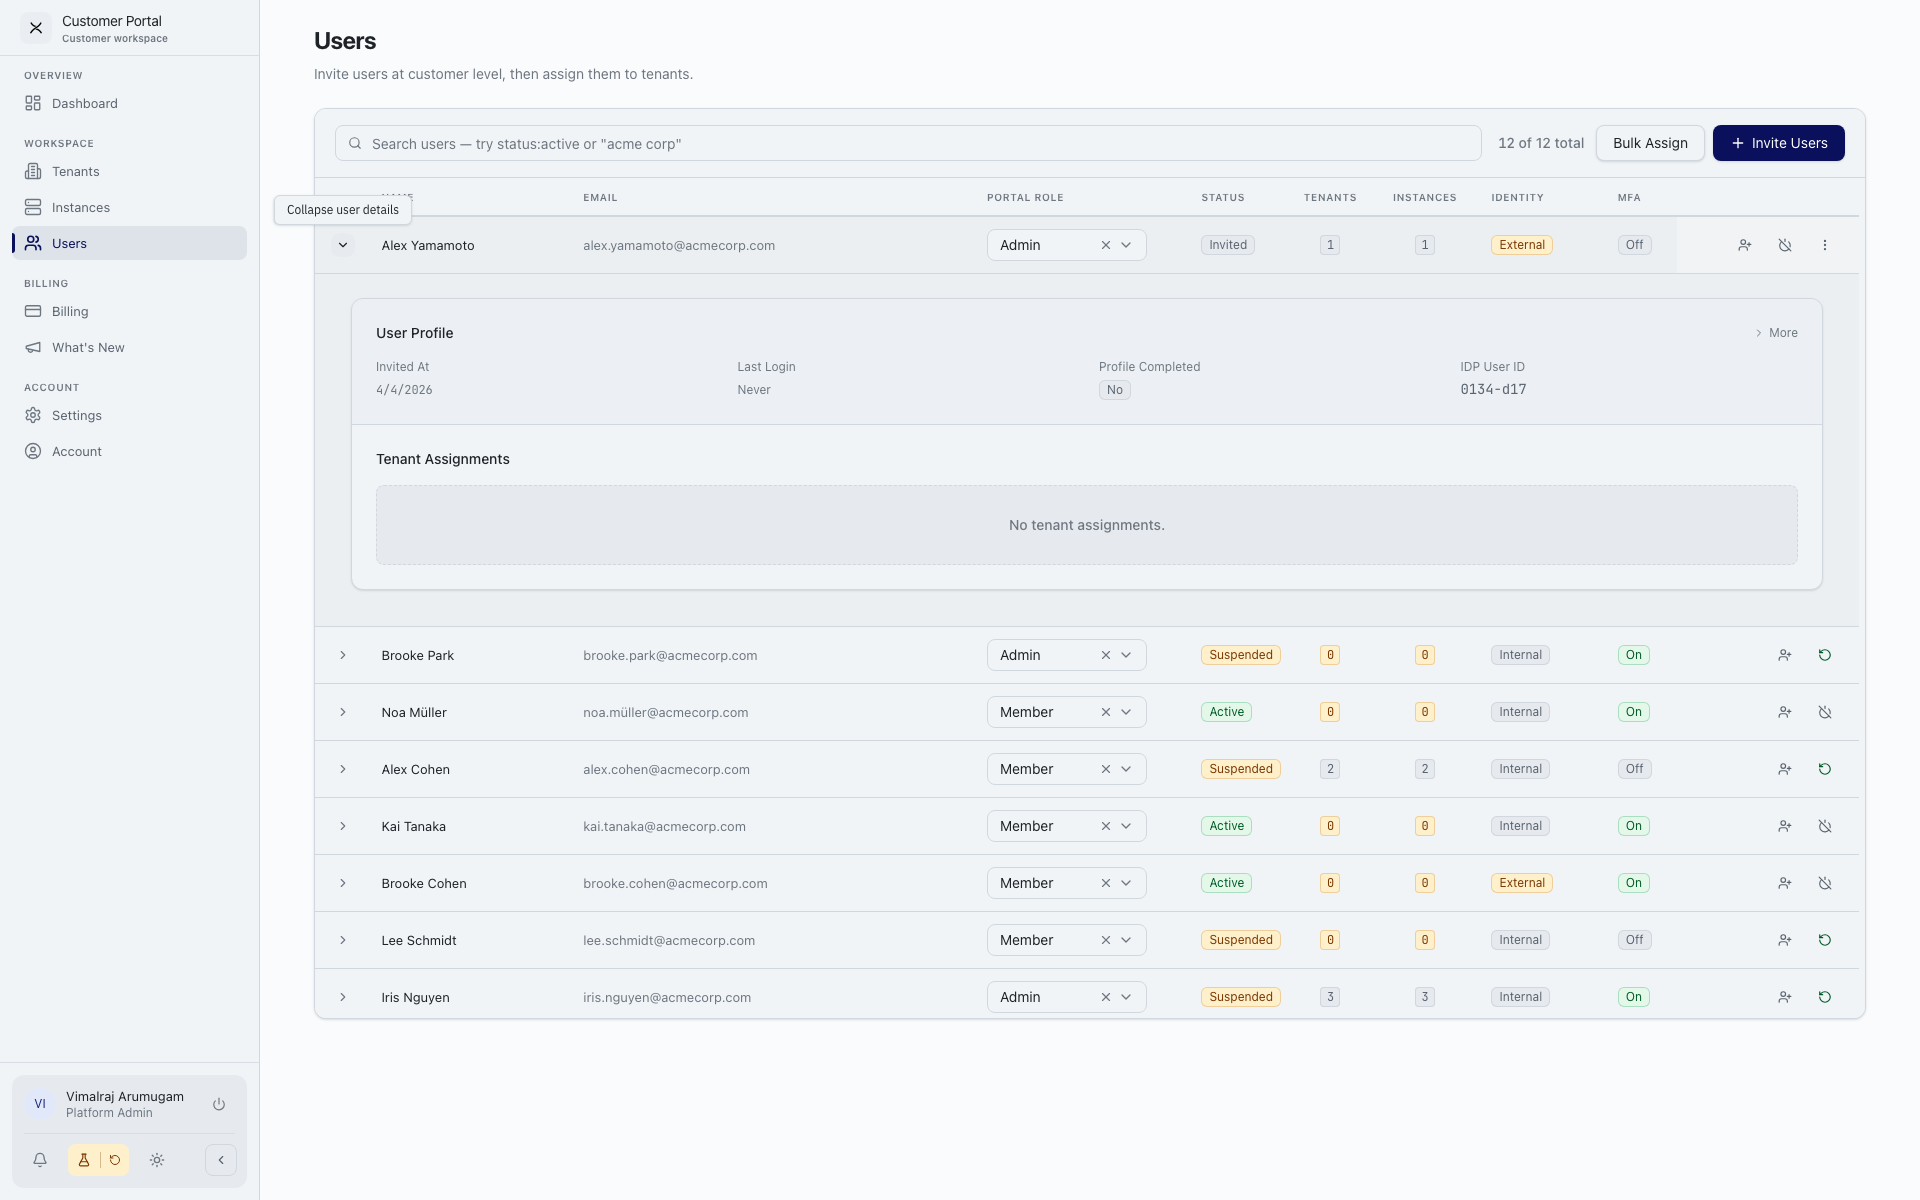
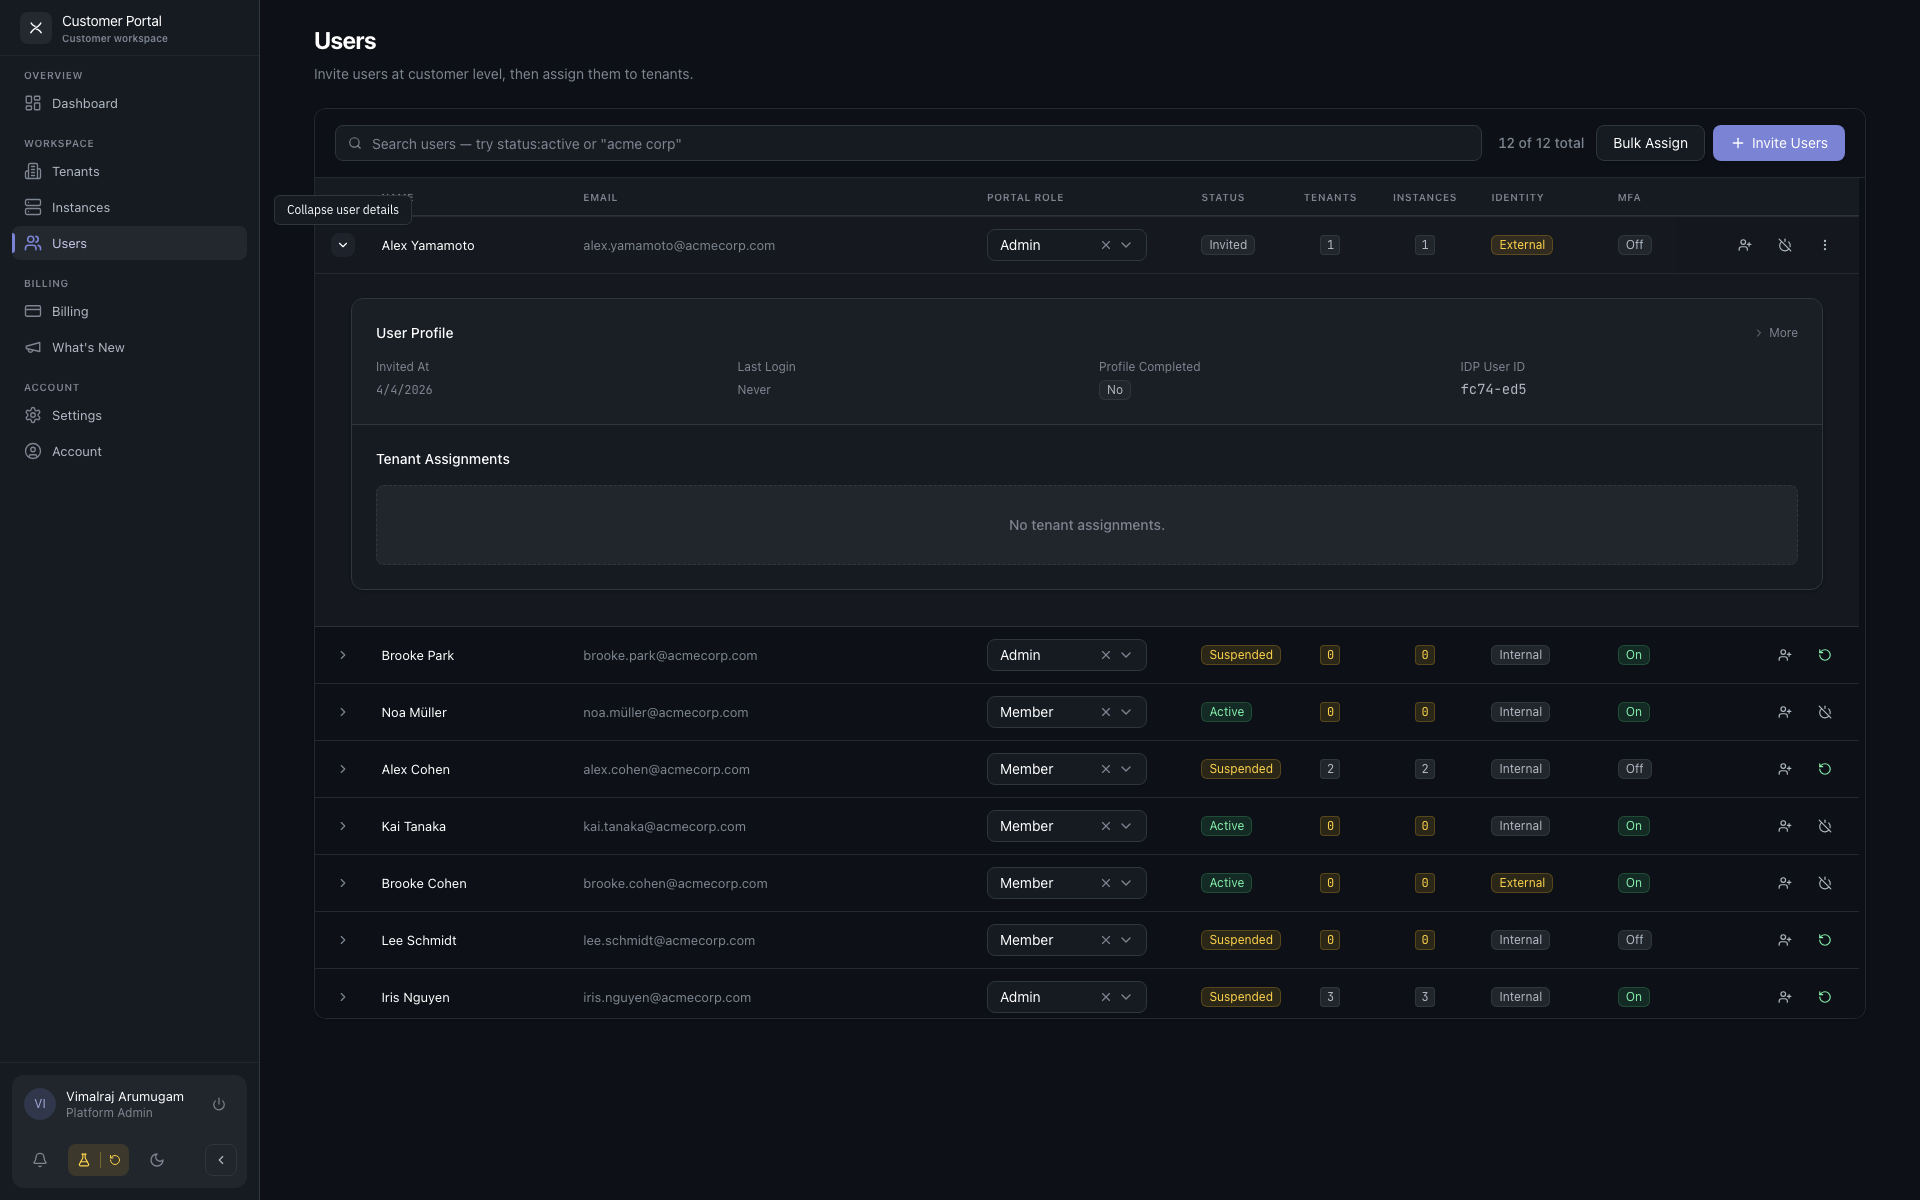
A short introduction at the top — "Invite users at customer level, then assign them to tenants." Below that, a paginated table with expandable rows. Toolbar with Bulk Assign and Invite Users buttons (if you have manage_users).
Columns
| Column | Notes |
|---|---|
| Expand | Toggle the detail row. |
| Name | |
| Portal Role | Owner / Admin / Member. Editable as a dropdown if you have manage_users. |
| Status | Active / Invited / Suspended. |
| Tenants | Count of assigned tenants. |
| Instances | Count of provisioned instances. |
| Identity | Internal / External badge. |
| MFA | Enabled / disabled. |
| Actions | Suspend / Reactivate on hover. |
Search and filters
The search field is token-aware. Type free text to match name or email, or use tokens:
status:active,status:invited,status:suspendedrole:owner,role:admin,role:member- Assignment state —
assigned,unassigned - Identity —
internal,external - MFA —
mfa:on,mfa:off
Custom user attributes that your organisation has enabled appear as additional filters.
Expanded row
Click the chevron on a user row to expand:
Summary header — Invited At, Last Login, Profile Completed flag, IDP User ID.
Full details — Invited By, Created, Updated, Profile Cached, all custom attributes, External Customer / Org ID.
Tenant Assignments sub-table — every tenant this user is assigned to, with role, status, and the instance the tenant lives on. You can change a user's role inside a tenant from the role dropdown here.
Inviting users
Click Invite Users. The bulk modal accepts pasted emails or an Excel upload.
- Compose — paste emails (one per line) or upload a spreadsheet.
- Review — the modal shows what will happen for each email:
- Already in customer — skipped.
- In system, not in customer — granted access (warning icon).
- New — invited.
- Roles & details — set the portal role per invitee.
- Send invites. The result screen lists successes and failures.
Bulk assigning existing users
Click Bulk Assign to assign customer users to a tenant at once.
- Pick the tenant.
- Search and select the users to assign.
- Pick a role for each (Tenant User / Tenant Admin).
- Assign.
Per-user actions
- Suspend / Reactivate — hover the row to reveal the action.
- Change Portal Role — use the dropdown in the Portal Role column.
- Resend Invite — only for users still in
invitedstatus.
Permissions
| Action | Requires |
|---|---|
| Viewing this page | view_users |
| Inviting, suspending, assigning, role changes | manage_users |
Without manage_users, the table is read-only — the toolbar buttons and row actions do not appear.